

Before You Start
You’ll need:
- A self-custodied wallet. Kamui supports MetaMask, Coinbase Wallet, Rainbow, WalletConnect, Ledger, OKX Wallet, and Trust Wallet, as well as other institutionally supported wallets.
- USDC on Ethereum mainnet: deposits and withdrawals are denominated in USDC.
- A small amount of ETH for network (gas) fees. Kamui charges no fee to deposit or withdraw, but Ethereum transactions require gas.
Connecting your wallet
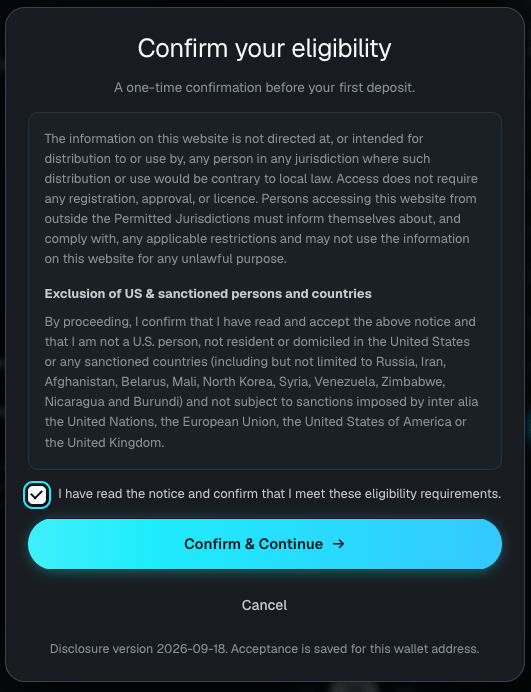
Select Connect Wallet in the top right of the app and choose your wallet. Before your first deposit, you’ll be asked to accept the Kamui Finance terms once, this is not repeated on later deposits from the same wallet. Each deposit is automatically screened against sanctions lists; no documents or extra steps are required.Deposits are open to approved wallets only.
How to Deposit
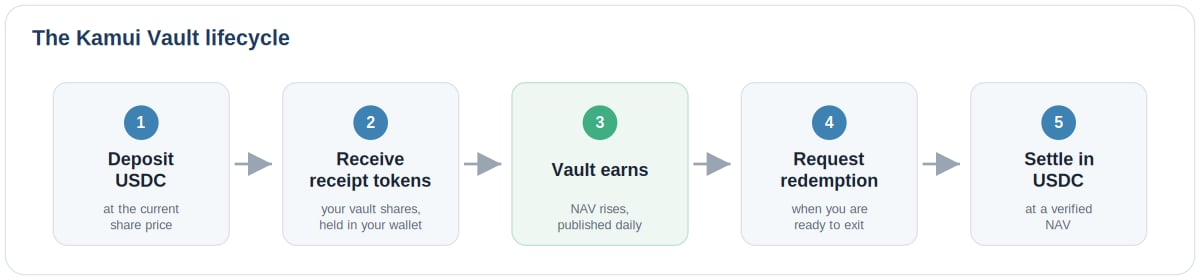
During the initial launch period, deposits are open to approved wallets only. If your wallet is not yet approved, please reach out to your contact at Kamui. Deposits are made in USDC directly from major supported self-custodied wallets.. Before the first deposit from a given wallet, the depositor accepts the Kamui Finance terms once. That acceptance is not repeated on later deposits from the same wallet. Each deposit triggers automatic sanctions screening against the connecting wallet address without any additional steps. Once screening clears, the USDC deposit is accepted into the chosen vault and the vault smart contract mints receipt tokens to the depositor’s wallet. The minimum deposit is 1 USDC. There is no maximum. The deposit flow runs entirely in the panel on the right of the vault page, from entering an amount through to on-chain confirmation.1
Open the vault and select Deposit
On the vault page, the panel on the right carries Deposit, Withdraw, and Pending tabs, with Deposit selected by default. It shows your total holdings in USDC.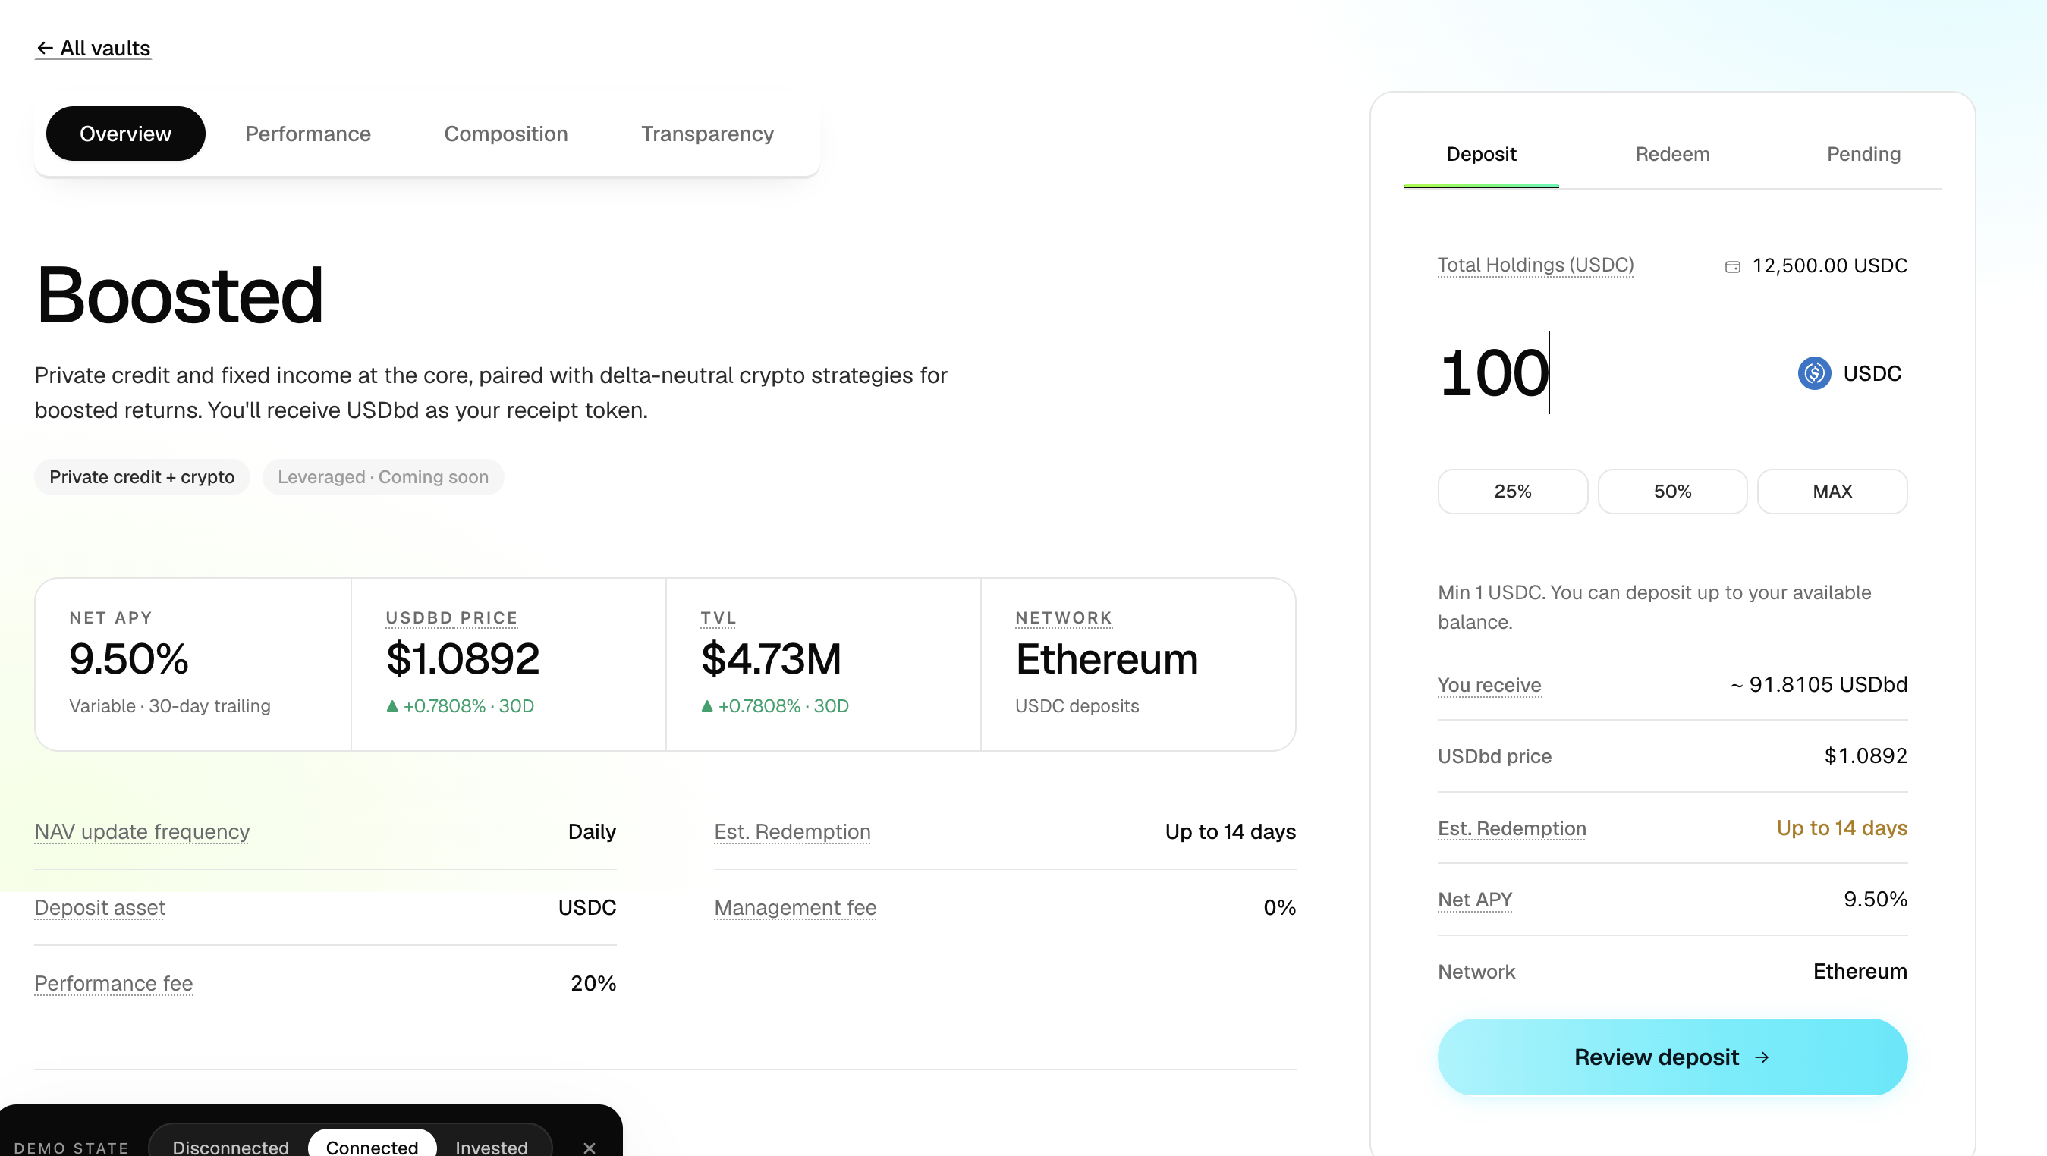
2
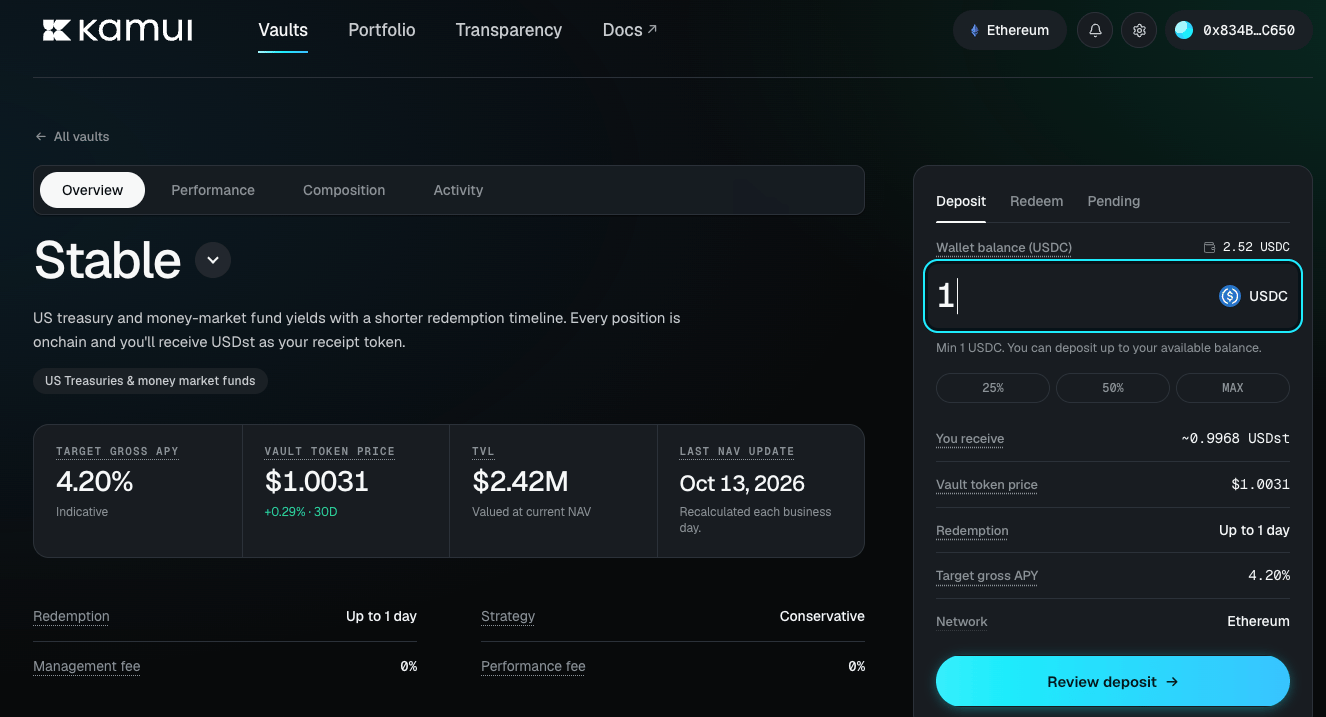
Enter an amount
Type a USDC amount, or use the 25%, 50%, or MAX shortcuts. The panel updates the You receive figure (the receipt tokens you will get), along with the receipt-token price, estimated withdrawal window, net APY, and network. The minimum is 1 USDC.
3
Confirm your eligibility to deposit
4
Review the deposit
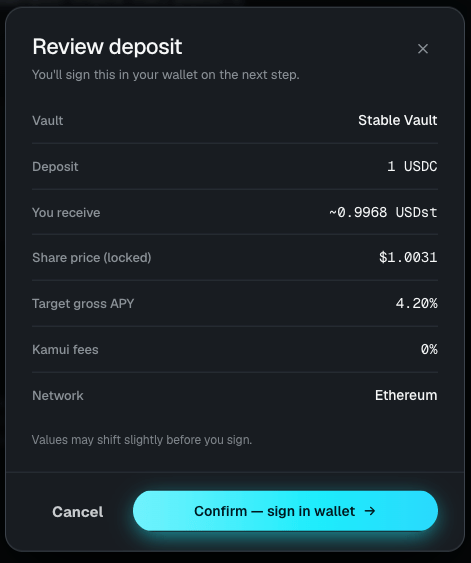
Select Review deposit. A summary opens with the amount you will deposit, the receipt tokens you will receive, the vault, the locked share price, the network, and the settlement window.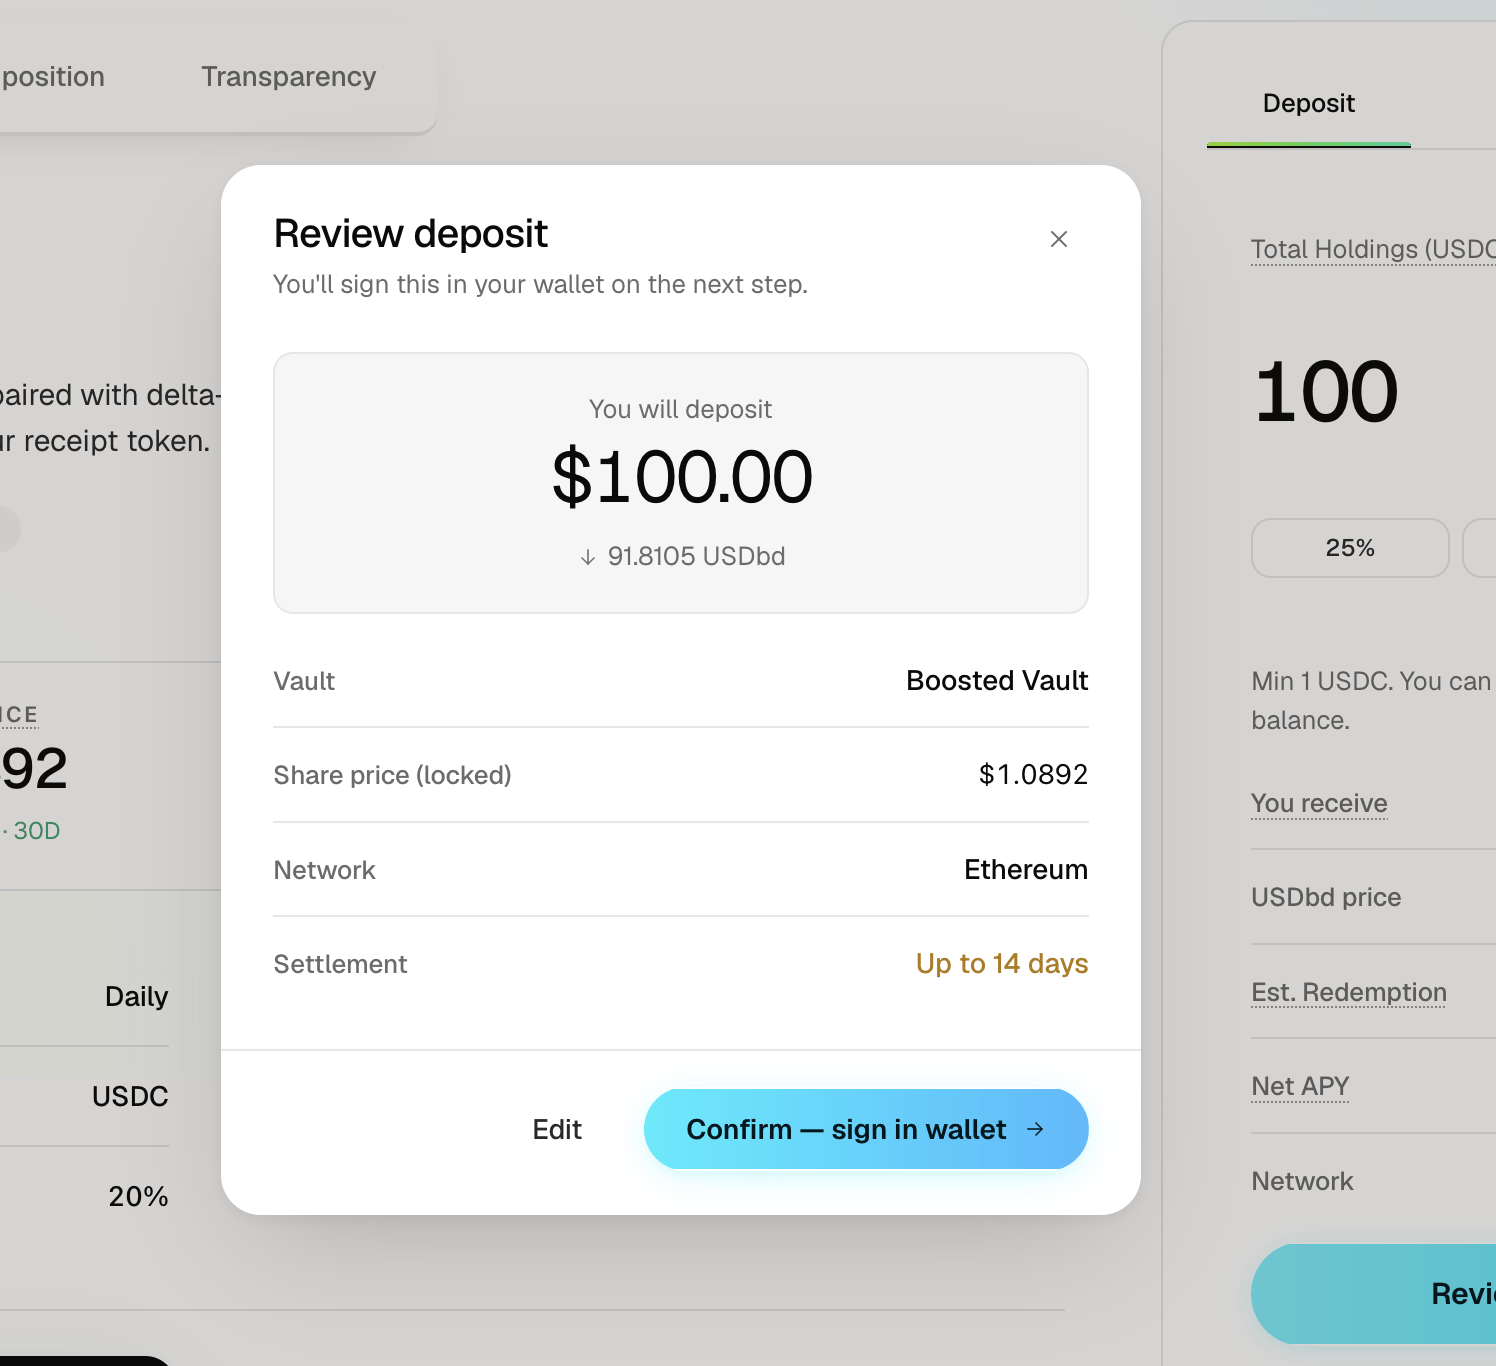
5
Confirm and sign
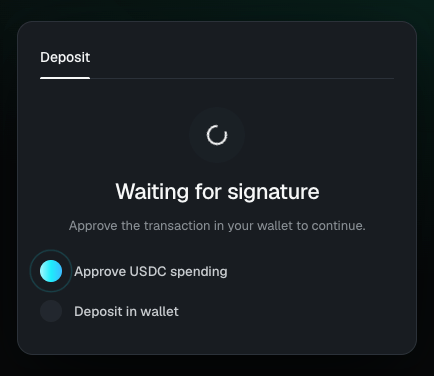
Select Confirm to sign the transaction in your wallet. The panel then shows Submitting deposit and Awaiting Ethereum confirmation, with the transaction hash and a confirmation counter.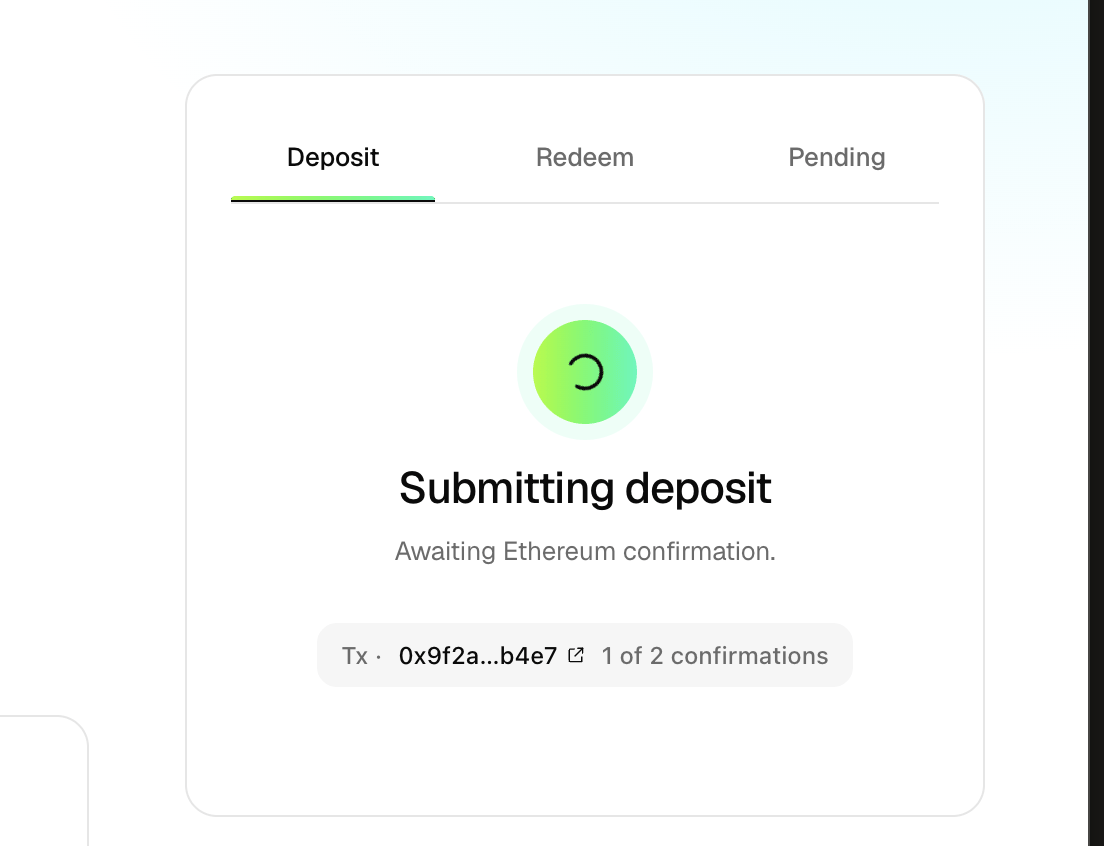
6
Deposit confirmed
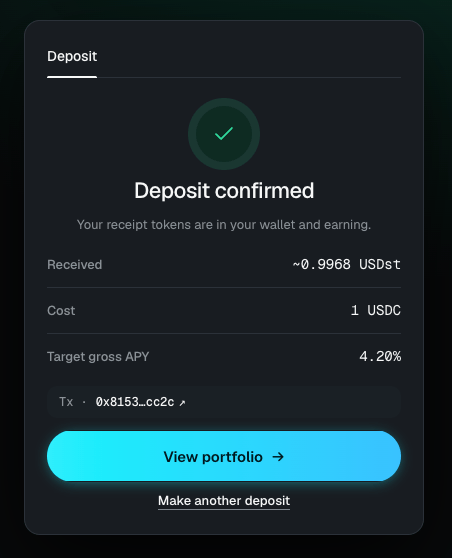
Once confirmed, the panel shows Deposit confirmed and the note that your receipt tokens are in your wallet and earning. From here you can View portfolio or make another deposit.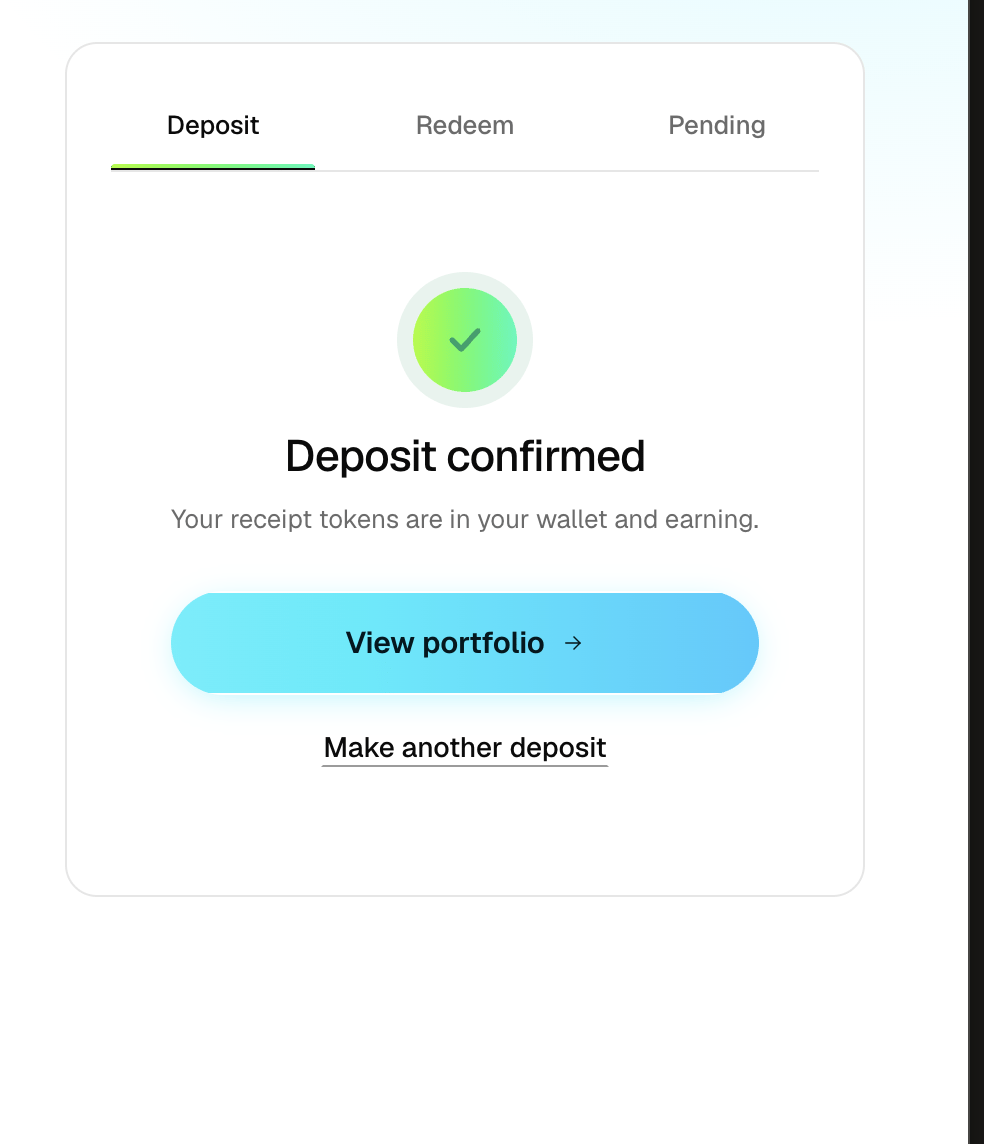
Monitor Your Portfolio
The receipt token — USDst for the Stable Vault, USDbd for the Balanced Vault, or USDbt for the Boosted Vault — is the on-chain record of a depositor’s interest in that vault. It is an ERC-20 token. A depositor is beneficially entitled to a proportionate share of the vault’s underlying assets for as long as they hold the token, and to nothing beyond that: the receipt token carries no governance rights and confers no rights beyond the vault entitlement itself. The quantity of receipt tokens a depositor holds does not change while the position is open. What changes is the value each token represents. All underlying assets in a vault are accumulating, meaning yield compounds into the vault’s published NAV rather than being distributed to holders. The NAV per token rises over time as a result, so a fixed quantity of receipt tokens becomes withdrawable for a growing amount of USDC. The receipt token sits in the depositor’s own self-custodied wallet at all times. Kamui does not hold it on the depositor’s behalf. Because the token itself is the ownership record, that entitlement does not depend on the availability of Kamui’s own systems. If Kamui’s applications are unavailable, the depositor can still act directly against the vault smart contract from any wallet, and requests submitted directly to the vault smart contract are detected and processed automatically, on the same basis as requests made through the app.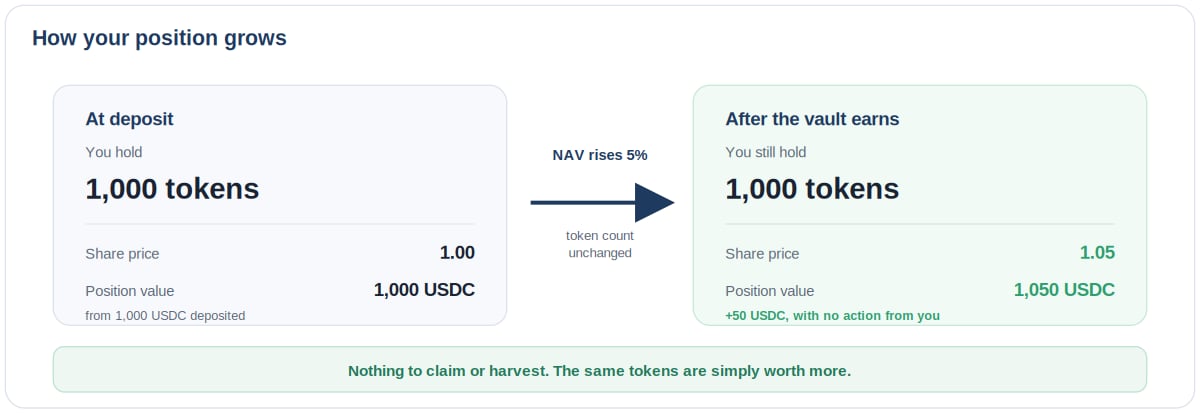
1
Open your portfolio
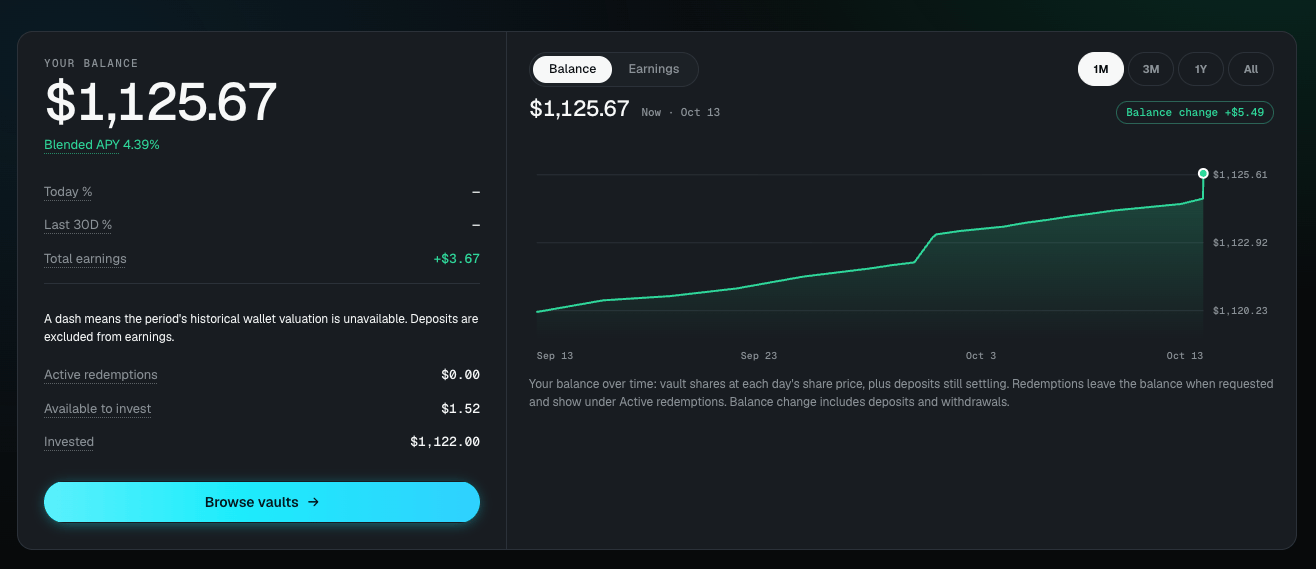
Reach it from the View Portfolio after a deposit, or from the portfolio area of the app. The header shows your balance and the rate you are earning, expressed as an APY.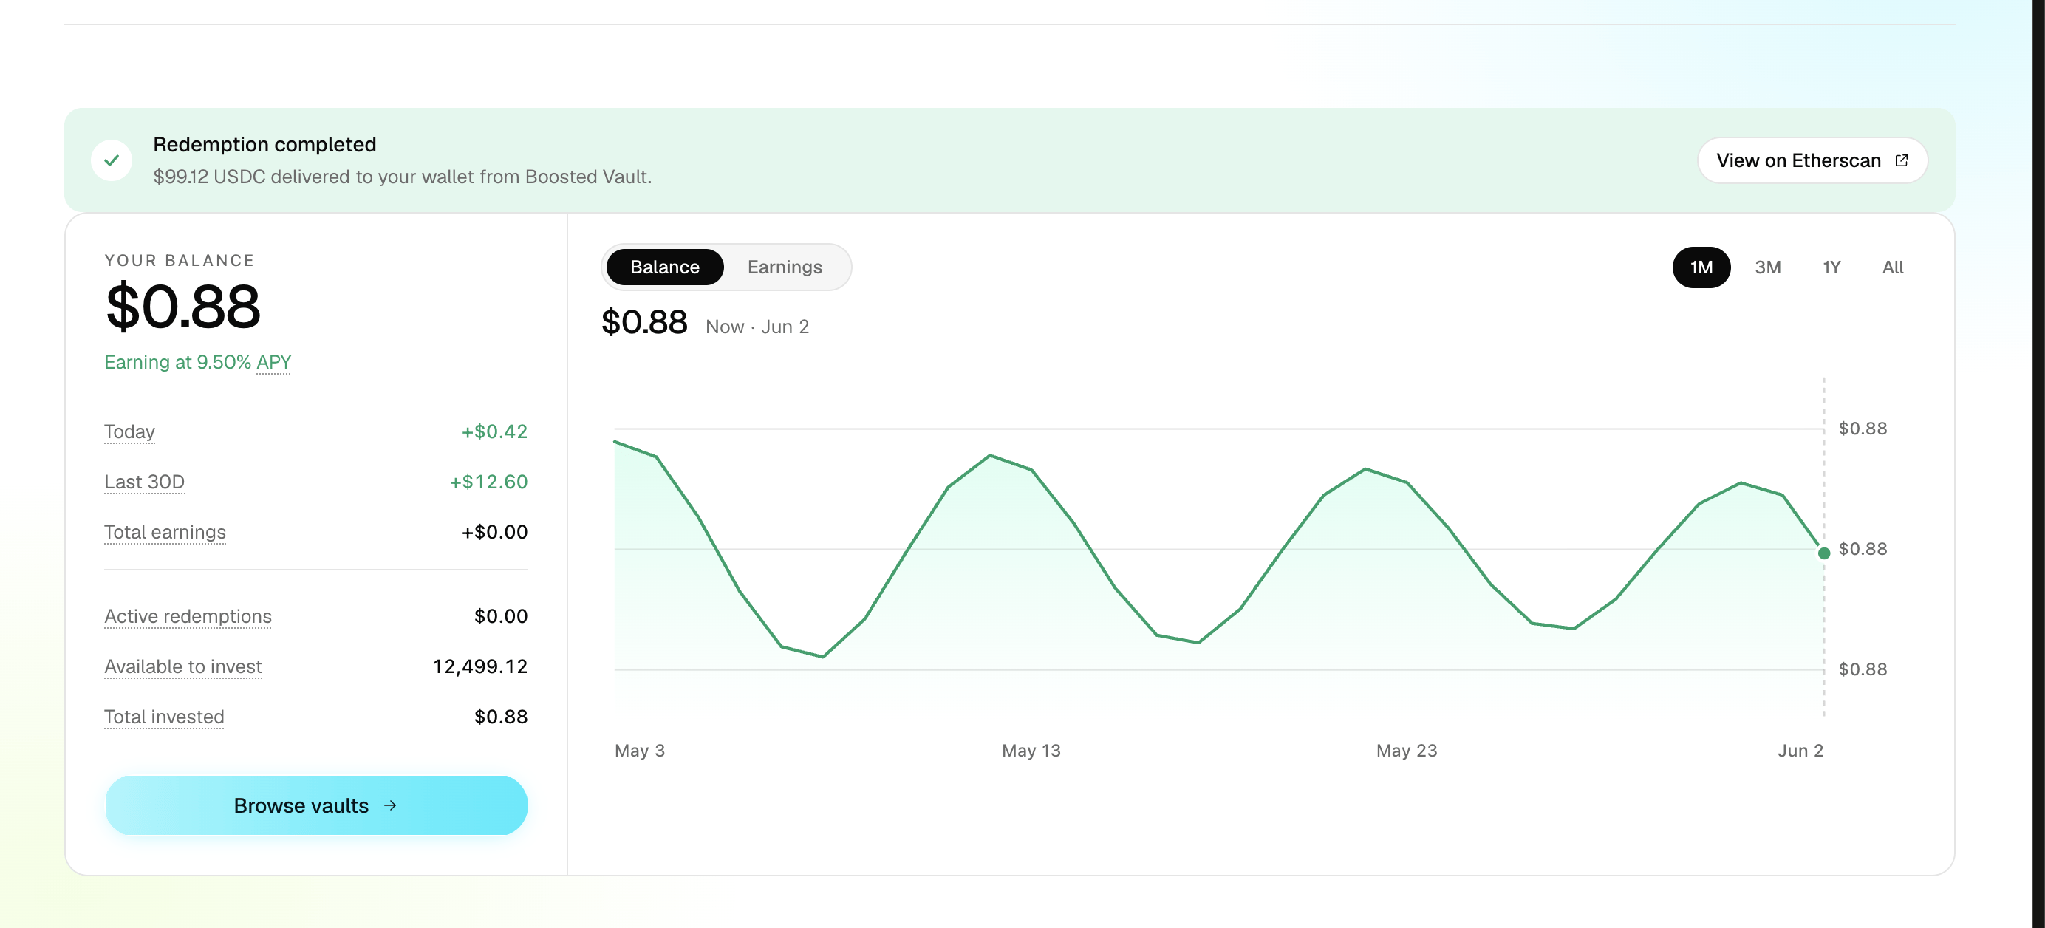
2
Read your balance and earnings
Below the balance, Today, Last 30D, and Total earnings track performance, alongside Active Withdrawals, Available to invest, and Total invested. The chart toggles between Balance and Earnings over a 1M, 3M, 1Y, or All range.
3
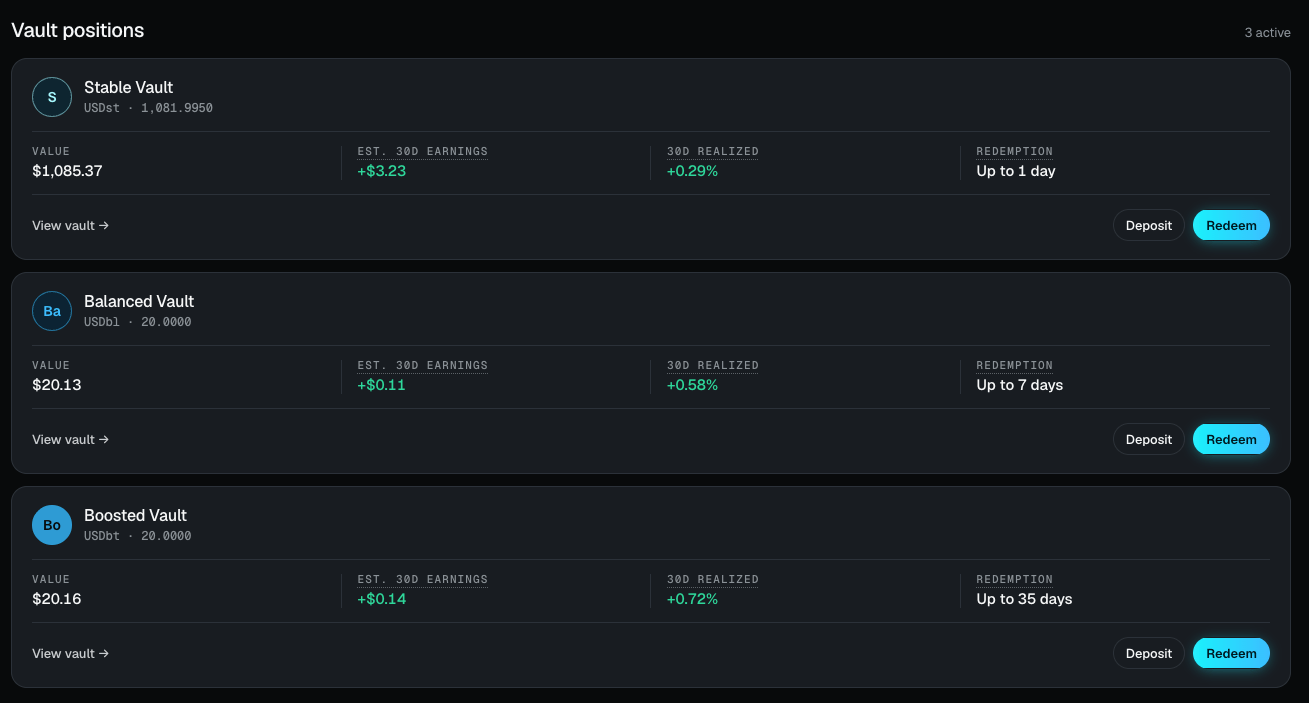
Check your vault positions
Vault positions lists each active position with its receipt-token balance and APY, plus its value, earnings, 30-day yield, and withdrawal window, and offers quick Deposit and Withdraw actions and a View vault link.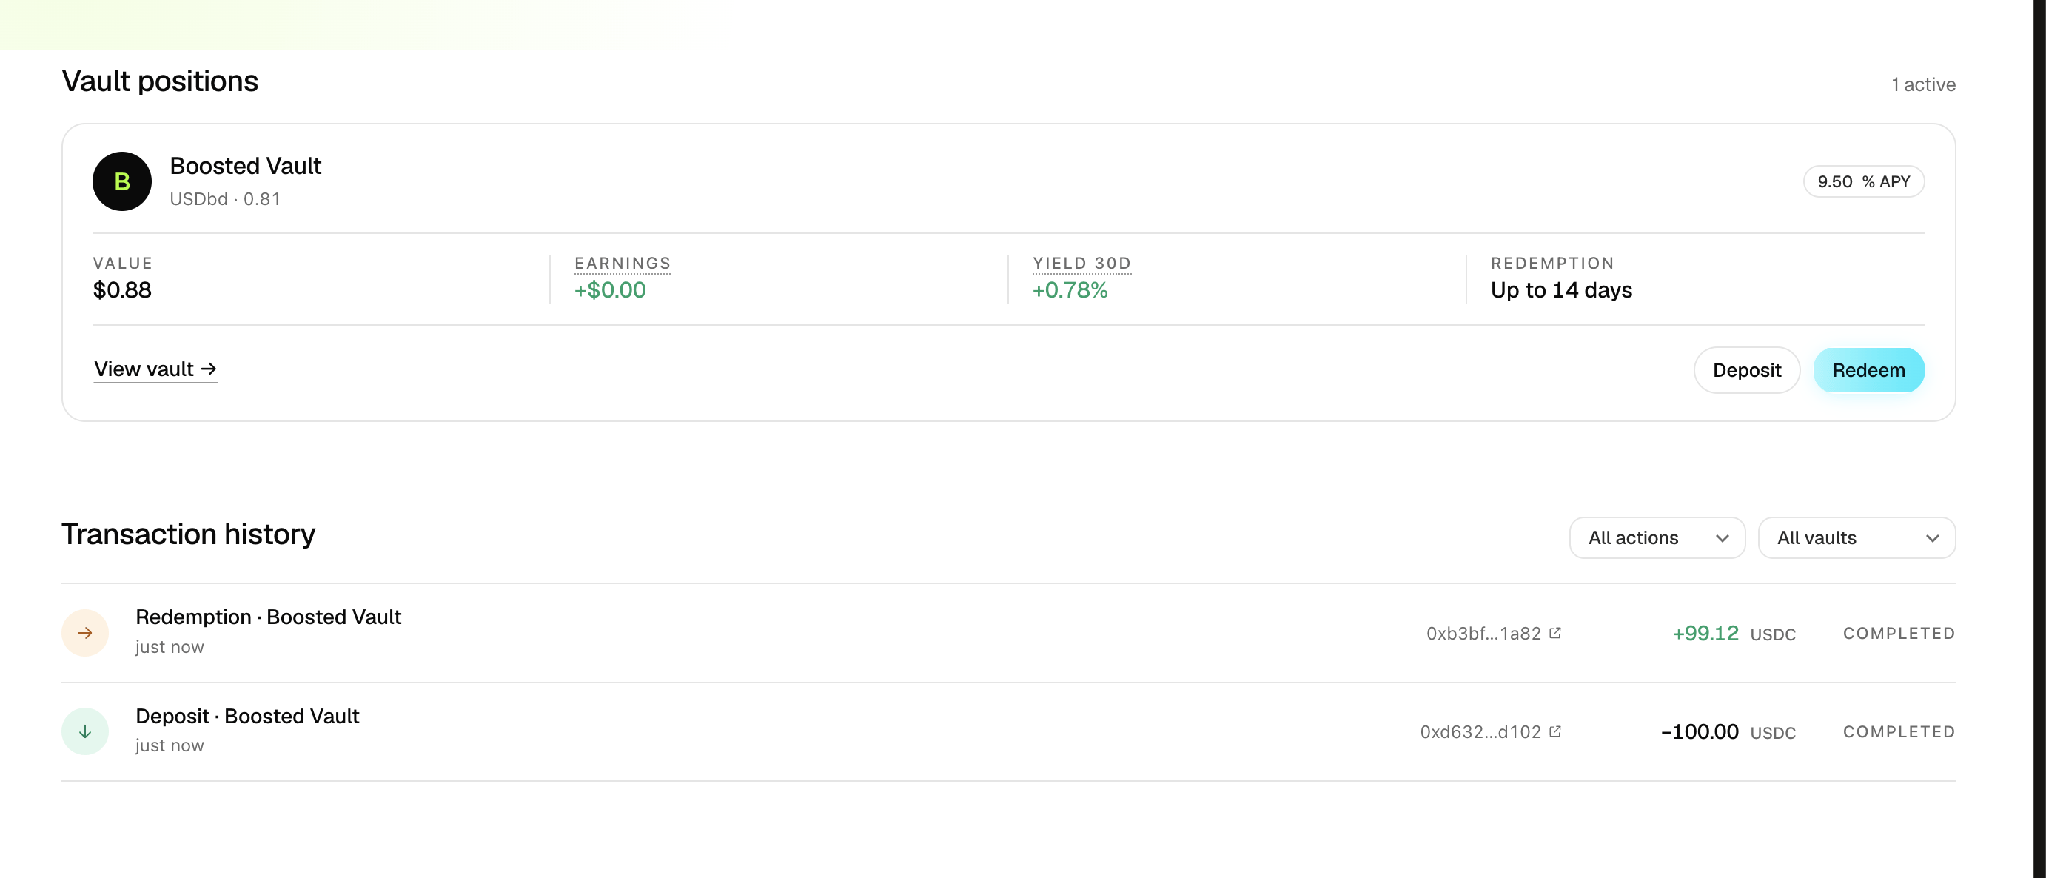
4
Review your transaction history
Every deposit and withdrawal is listed with its amount, an on-chain link, and a status such as Completed, and can be filtered by action or by vault.
How to Request Withdrawal
The vaults use the ERC-7540 asynchronous standard, so withdrawal is a two-step process. A depositor first submits receipt tokens to the vault smart contract for withdrawal. This creates a request, which is queued against NAV rather than settled immediately, so that the withdrawal timeline can reflect the liquidity of the vault’s underlying assets, which is not guaranteed to be instant across every asset type the vault holds. Queued requests are settled in batches on each business day, at that day’s verified NAV, the same NAV used to value deposits. There is no lock-up on principal and no early-withdrawal penalty. For a normal queue withdrawal, no fees or discounts are applied to the withdrawing holder. On settlement, the depositor’s receipt tokens are burned and USDC is returned. If the Kamui application is unavailable, a withdrawal request can still be submitted by interacting directly with the vault smart contract from any wallet. Requests coming through the smart contract are picked up by the operational backend and processed on the same basis as requests submitted through the application. Withdrawal timelines are handled on a best-effort basis, as they are for the underlying RWA instruments themselves. Kamui does not represent them as contractually guaranteed. The vault is structured, through the liquidity waterfall described in Product Architecture, so that realised timelines are typically shorter than the maximum window. In stressed market conditions, settlement can take longer than the typical timeline, up to the vault’s maximum window; if redemption demand exceeds available liquidity, requests are filled across settlement days with pro-rata allocation within a day.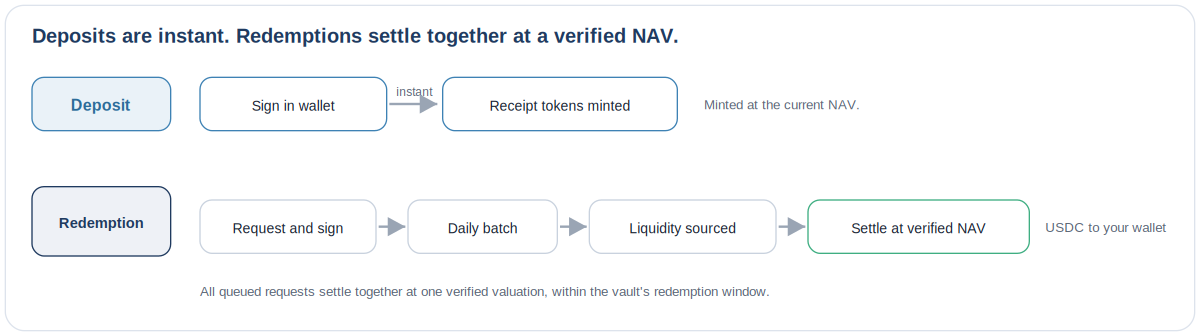
1
Open the Withdraw tab
On the vault panel, select Redeem. It shows your total holdings in the vault’s receipt token.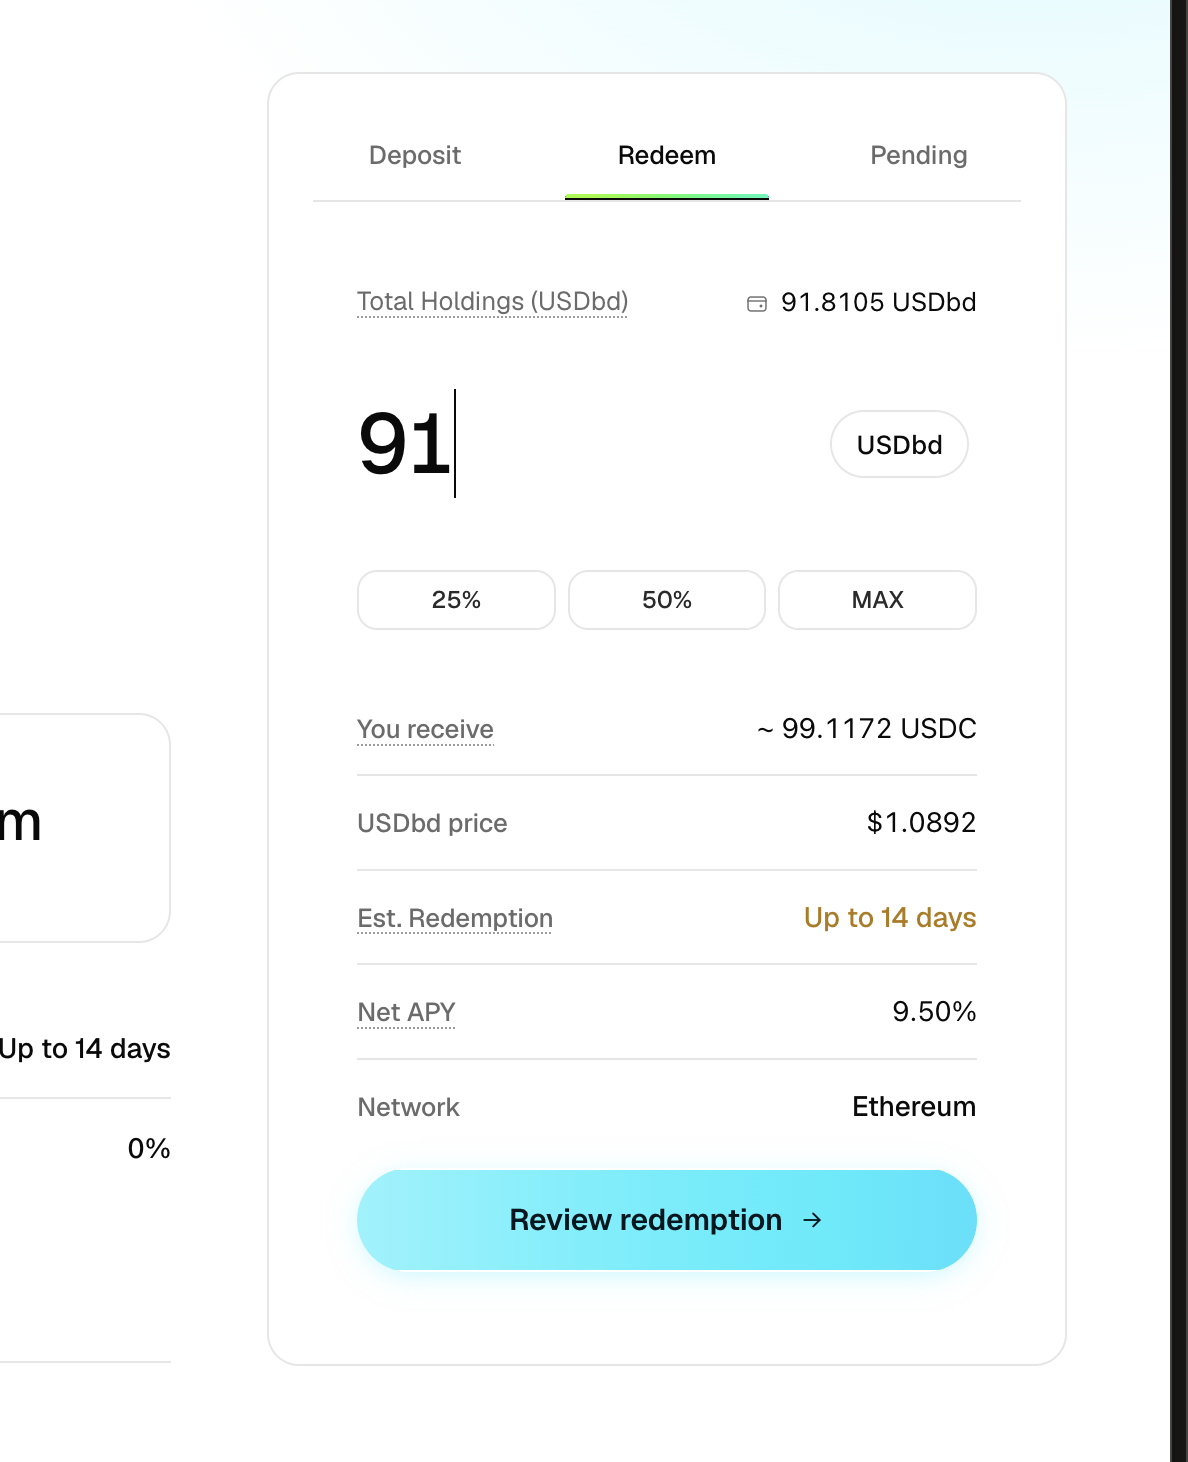
2
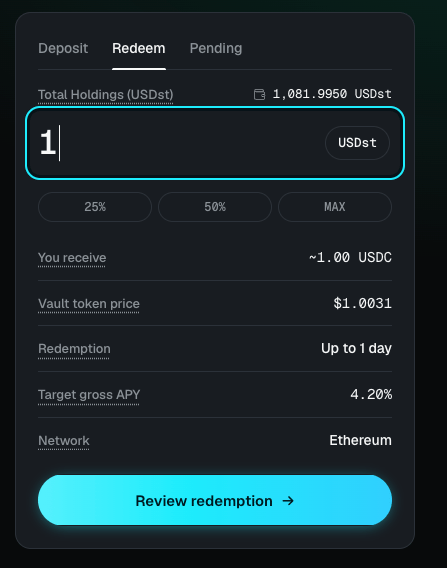
Enter an amount
Type a receipt-token amount, or use the 25%, 50%, or MAX shortcuts. The panel shows the You receive figure in USDC, the receipt-token price, the estimated withdrawal window, net APY, and network.
3
Review the withdrawal
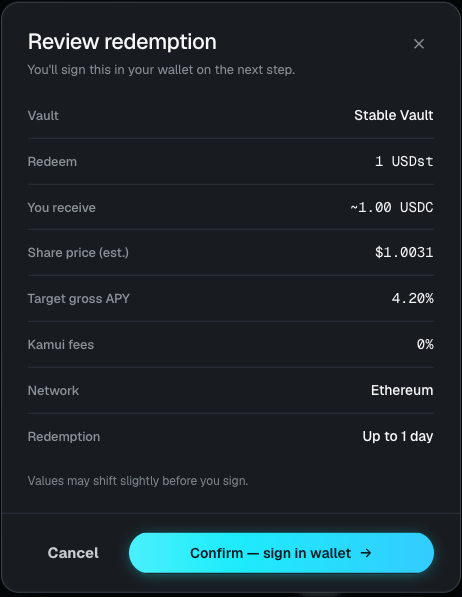
Select Review withdrawal. The summary shows the receipt tokens you will withdraw, the USDC you will receive, the vault, the locked share price, the network, and the estimated withdrawal window.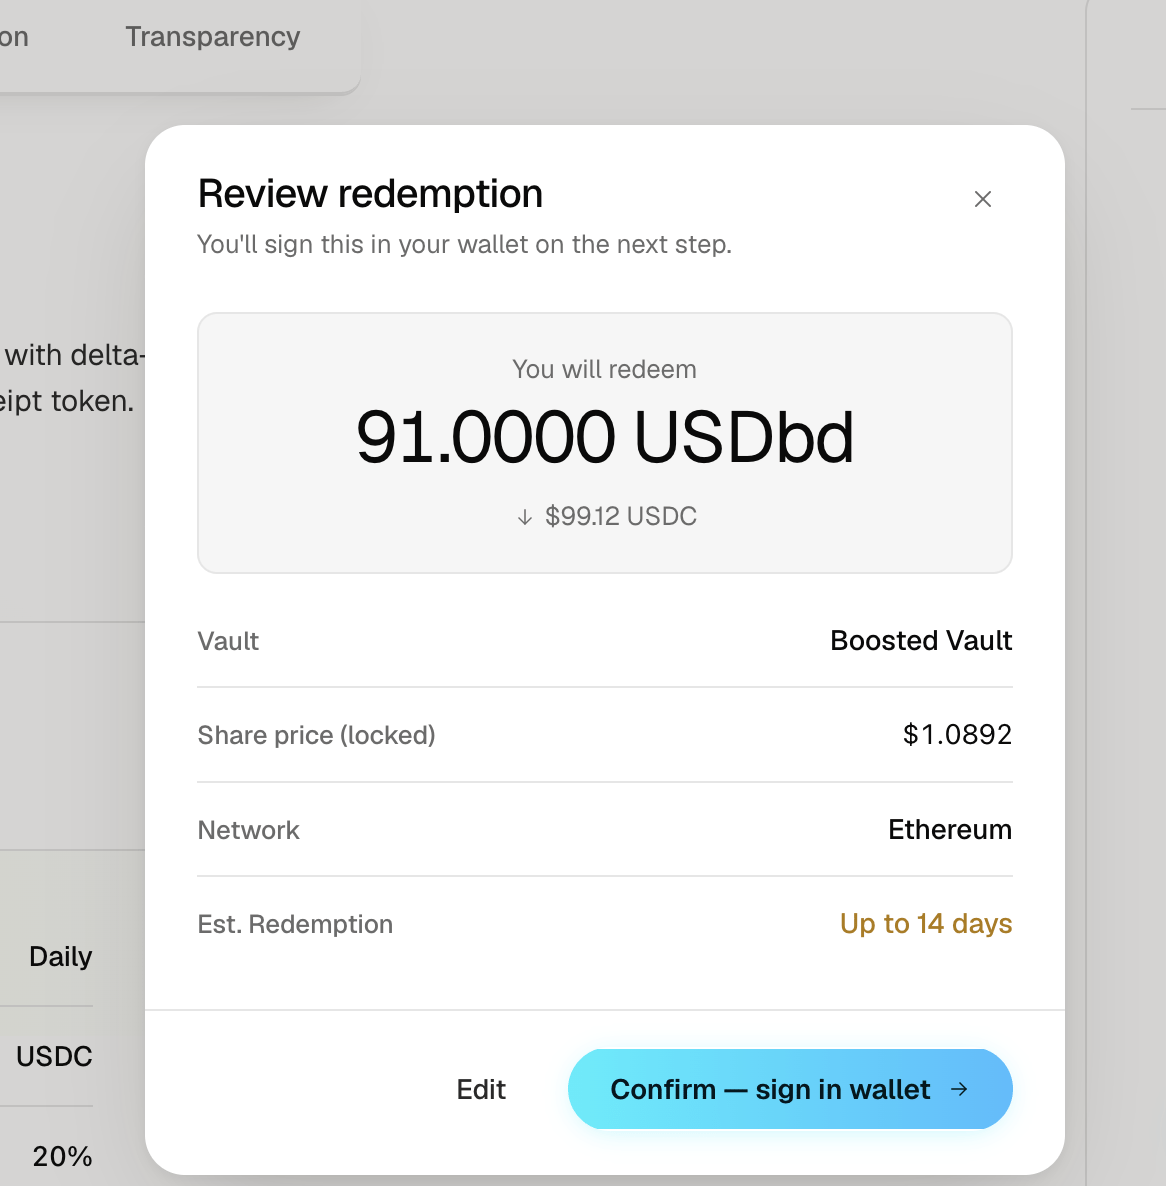
4
Confirm and sign
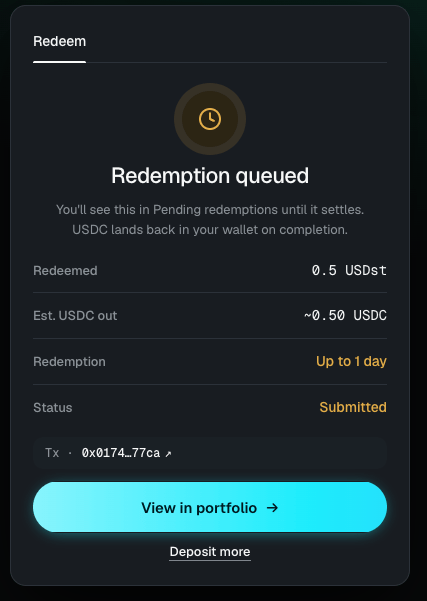
Select Confirm to sign in your wallet. The request is then queued, shown as Withdrawal queued, with the note that it stays in Pending Withdrawals until it settles and that USDC lands back in your wallet on completion.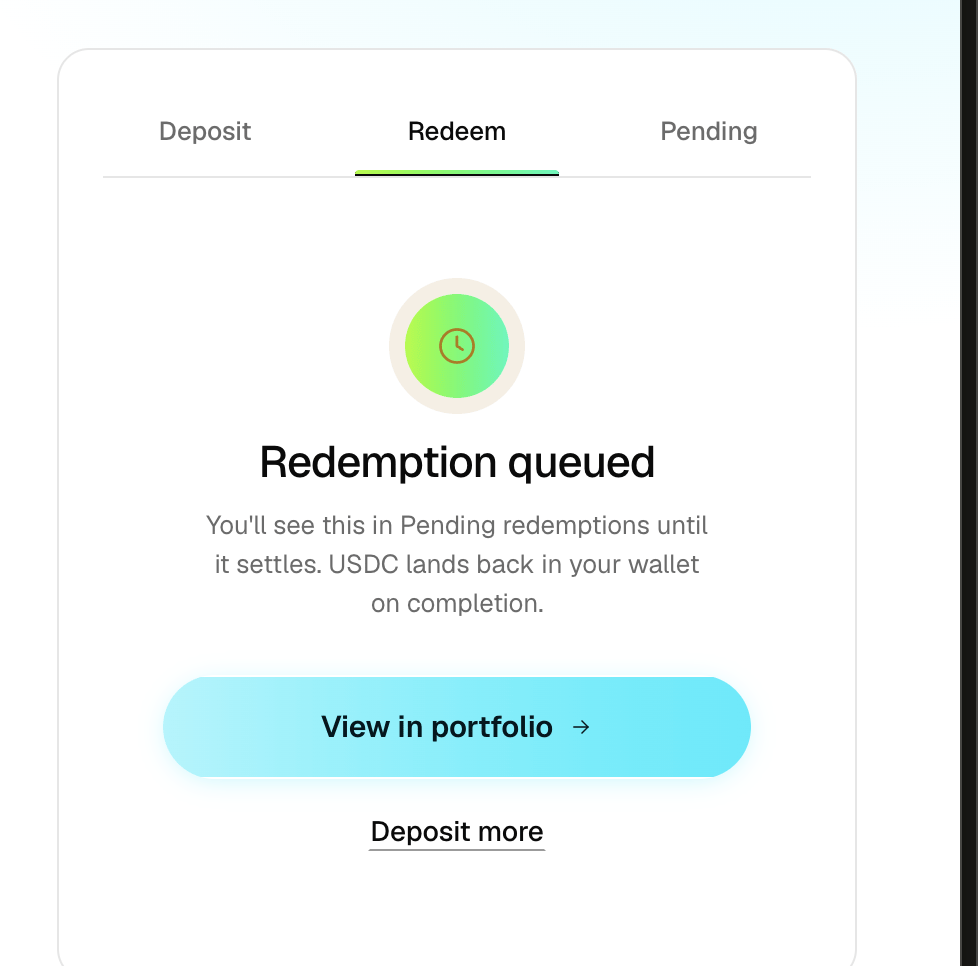
5
Settlement
The request stays under Pending for the vault’s withdrawal window. On completion, USDC is delivered to your wallet, the portfolio shows Withdrawal completed with a View on Etherscan link, and the entry appears as Completed in your transaction history, as shown under Monitor Your Portfolio above.
Withdrawal windows
The standard window a depositor experiences depends on which vault they hold, reflecting the liquidity of that vault’s underlying assets.
See Product Architecture for the mechanism behind these figures.